Preparation
If you have any questions of problems do remember that you can seek help and support via the forum.
Note. You might find it useful to look at the demo site to see what information is presented.
- Assemble the information you need to set up your web site, including…
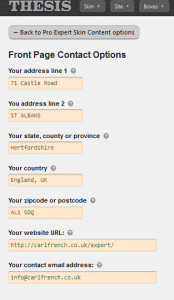
- Front page person’s title, strapline and brief description.
- Contact details: address, email address, phone number.
- The hex codes for the colors you wish to use. You may find it helpful to install colorzilla onto your Firefox of Chrome browser. It will enable you to identify the codes by means of a eyedropper.
- Assemble the initial image files you need to set up your web site, including…
- A head shot (or portrait) of the expert. Note that a “head shot” is a natural, informal portrait photograph. Recommended size 400px x 600px.
- The business logo.
- A favicon image. This is the tiny image to the left of the name in the browser tab. A square image 50px x 50px can be used – and loaded via the Thesis page.
The Steps
Open the Thesis Skin Content page. Then open and set up each of the following.
Note that the Thesis page has these in alphabetic order.
- Front Page About you

- Front Page Contact
- Collapsible Pro Expert Menu AND Alternate Nav Menu AND Front Page Pro Expert Menu.
By default the web site uses one menu but has 3 menus containers each of which needs to be set to the same menu. This may see strange at first sight but the reason is that menus are displayed differently depending upon the size of the display – and in particular smart phones and tablets have different menu styles for desktop computers and laptops.
- Front Social media

- Page Header Banner
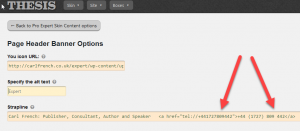
Note how this example shows how to add a phone number – in a format that will provide a click on dial on a smartphone. The format looks like this: <a href=”tel://+441727809442″>+44 (1727) 809 442</a>
- Footer Copyright

- Default Contact Form

- Default Products List
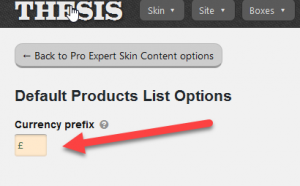
Note that this merely enables you to enter the currency symbol or prefix you wish to use on the products page.
- Extra Post Text Box
This box can be used to enter additional text onto the blog page. On a desktop computer this appears as a right hand panel. On a smart phone or tablet it will appear below the main content.