Preparation
Note that you have plenty of scope to tailor and extend the installation to your own individual requirements but we recommend that you take the following steps first. They will lead to a site similar to the demo site.
- Makes sure you have WordPress installed and that you have access to an admin account.
- Change the WordPress default settings as follows..
- Create a new page to be the front page (Home page).
- Create a blank page called “Blog”.
- Go to the WordPress “Reading” page, under Settings. Under “Front page display” select “static page” and then select the “Home” page as your front page and the “Blog” page as your “Posts page”. Save your changes.

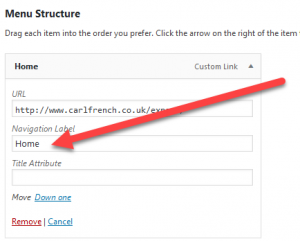
- Add these pages to the menu (under appearances) and you may wish to change the menu name of your home page to “Home”.
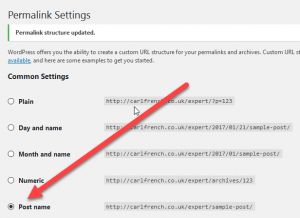
- Change the WordPress Permalinks page common settings to “Post name”. Save your changes.
- Install the Thesis Theme and activate it.
- The Pro Expert comes with with a Thesis Client Site License and the Thesis installation file (thesis.zip) is included in your download.
- If you want to have your own Thesis account and license then you can purchase one at diythemes.com.
Install
Go to the Thesis “Manage Skins” menu, upload the The Pro Expert skin file (ebc_pro_expert.zip) and activate the skin.
Congratulations! Now you are ready to set up your web site using the The Pro Expert skin..
Backup
We recommend that you backup your installation now and after each major change. You may like to install the XCloner plugin for that purpose.